
[IaC]Terraform 사용하기 with AWS #03 고도화
테라폼을 이용하여, 테라폼 코드를 고도화하고 효율적으로 사용할 수 있는 방법에 대해 포스팅하였습니다.
Terraform Backend 란?
Terraform “Backend” 는 Terraform의 state file을 어디에 저장을 하고, 가져올지에 대한 설정입니다. 기본적으로 로컬 스토리지에 저장을 하지만, 설정에 따라서 s3, consul, etcd 등 다양한 “Backend type“을 사용할 수 있습니다.
Terraform Backend 를 사용하는 이유?
- Locking: 보통 Terraform 코드를 혼자 작성하지 않습니다. 인프라를 변경한다는 것은 굉장히 민감한 작업이 될 수 있습니다. 원격 저장소를 사용함으로써 동시에 같은 state를 접근하는 것을 막아 의도치 않은 변경을 방지할 수 있습니다.
- Backup: 로컬 스토리지에 저장한다는건 유실할 수 있다는 가능성을 내포합니다. S3와 같은 원격저장소를 사용함으로써 state 파일의 유실을 방지합니다.
Terraform에서 가장 보편적으로 사용하는 s3 backend 를 예제로 합니다. AWS S3는 쉽게 구축할 수 있으며 versioning 을 지원하는 안전한 저장소입니다.
Terraform Backend 실습
S3 bucket as backend
테라폼의 상태를 저장하기 위해 S3 버킷을 생성합니다. AWS S3는 쉽게 구축할 수 있으며 versioning 을 지원하는 안전한 저장소입니다.
DynamoDB Table for Lock
동시에 같은 파일을 수정하지 못하도록 하기 위해 DynamoDB에 작업에 대한 Lock을 생성합니다.
- vim init.tf
provider "aws" {
  region = "ap-northeast-2" # Please use the default region ID
  version = "~> 2.49.0" # Please choose any version or delete this line if you want the latest version
}

# S3 bucket for backend
resource "aws_s3_bucket" "tfstate" {
  bucket = "tf101-jupiter-apne2-tfstate"

  versioning {
    enabled = true # Prevent from deleting tfstate file
  }
}

# DynamoDB for terraform state lock
resource "aws_dynamodb_table" "terraform_state_lock" {
  name           = "terraform-lock"
  hash_key       = "LockID"
  billing_mode   = "PAY_PER_REQUEST"

  attribute {
    name = "LockID"
    type = "S"
  }
}
terraform {
    backend "s3" {
      bucket         = "terraform-s3-bucket"
      # 버킷 이름
      key            = "own-your-path/terraform.tfstate"
      # s3 내에서 저장되는 경로를 의미
      region         = "ap-northeast-2"
      encrypt        = true
      dynamodb_table = "terraform-lock"
    }
}
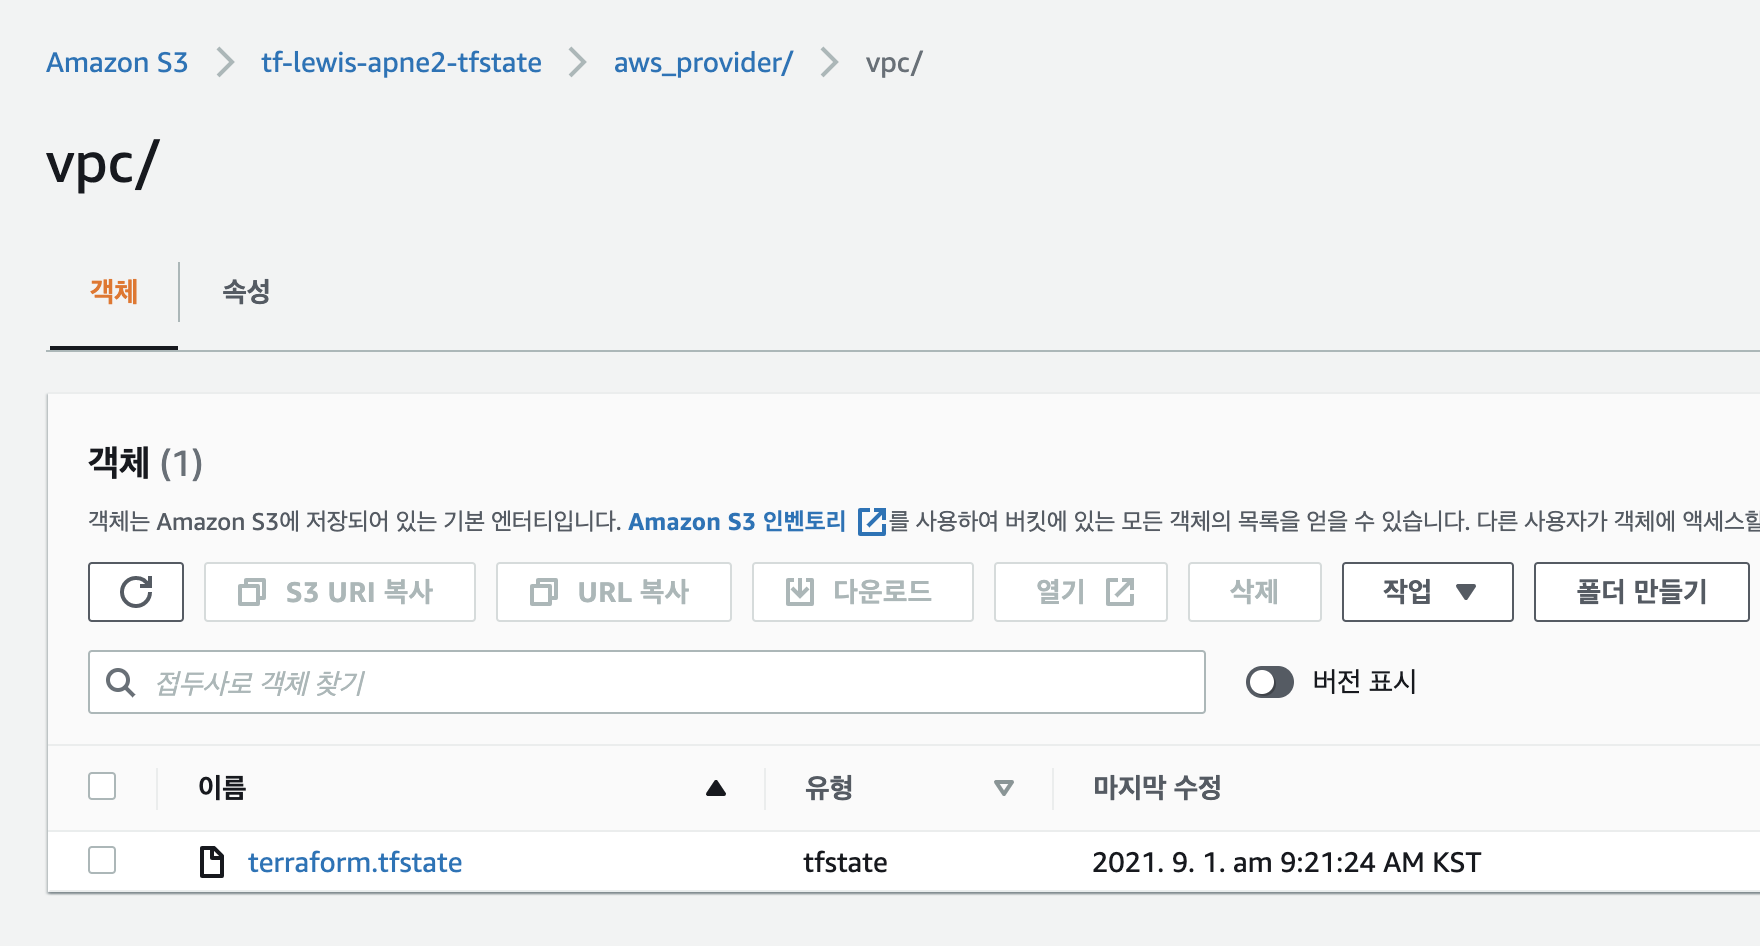
- state 파일이 S3에 backend로 저장된다.
Terraform variables 사용하기
Terraform은 HCL이라는 언어를 사용하며, 변수를 정의하고 사용할 수 있다.
참고 - https://www.terraform.io/docs/language/values/variables.html
Variable Types
- string
- number
- bool
Complex variable types
- list()
- set()
- map()
- object({ = , … })
- tuple([, …])
variable "image_id" {
  type = string
}

variable "availability_zone_names" {
  type    = list(string)
  default = ["us-west-1a"]
}

variable "ami_id_maps" {
  type = map
  default = {}
}
- terraform.tfvars
image_id = "ami-064c81ce3a290fde1"
availability_zone_names = ["us-west-1a","us-west-1b","us-west-1c"]
ami_id_maps = {
    ap-northeast-2 = {
      amazon_linux2 = "ami-010bf43fe22f847ed"
      ubuntu_18_04  = "ami-061b0ee20654981ab"
    }

    us-east-1 = {
      amazon_linux2 = "ami-0d29b48622869dfd9"
      ubuntu_18_04  = "ami-0d324124b7b7eec66"
    }
}
Terraform fuction 사용하기
Terraform 에서는 기본 내장된 다양한 함수를 사용할 수 있다.
https://www.terraform.io/docs/language/functions/index.html
Functions
- Numeric functions
- String functions
- Collection functions
- Encoding functions
- Filesystem functions
- Date and Time functions
- Hash and Crypto functions
- IP Network functions
- Type Conversion Functions
Terraform fuction 실습
# VPC
# Whole network cidr will be 10.0.0.0/8
# A VPC cidr will use the B class with 10.xxx.0.0/16
# You should set cidr advertently because if the number of VPC get larger then the ip range could be in shortage.
resource "aws_vpc" "default" {
  cidr_block           = "10.${var.cidr_numeral}.0.0/16" # Please set this according to your company size
  enable_dns_hostnames = true

  tags = {
    Name = "vpc-${var.vpc_name}"
  }
}

# Internet Gateway
resource "aws_internet_gateway" "default" {
  vpc_id = aws_vpc.default.id

  tags = {
    Name = "igw-${var.vpc_name}"
  }
}


## NAT Gateway
resource "aws_nat_gateway" "nat" {
  # Count means how many you want to create the same resource
  # This will be generated with array format
  # For example, if the number of availability zone is three, then nat[0], nat[1], nat[2] will be created.
  # If you want to create each resource with independent name, then you have to copy the same code and modify some code
  count = length(var.availability_zones)

  # element is used for select the resource from the array
  # Usage = element (array, index) => equals array[index]
  allocation_id = element(aws_eip.nat.*.id, count.index)

  #Subnet Setting
  # nat[0] will be attached to subnet[0]. Same to all index.
  subnet_id = element(aws_subnet.public.*.id, count.index)

  lifecycle {
    create_before_destroy = true
  }

  tags = {
    Name = "NAT-GW${count.index}-${var.vpc_name}"
  }

}

# Elastic IP for NAT Gateway
resource "aws_eip" "nat" {
  # Count value should be same with that of aws_nat_gateway because all nat will get elastic ip
  count = length(var.availability_zones)
  vpc   = true

  lifecycle {
    create_before_destroy = true
  }
}


#### PUBLIC SUBNETS
# Subnet will use cidr with /20 -> The number of available IP is 4,096  (Including reserved ip from AWS)
resource "aws_subnet" "public" {
  count  = length(var.availability_zones)
  vpc_id = aws_vpc.default.id

  cidr_block              = "10.${var.cidr_numeral}.${var.cidr_numeral_public[count.index]}.0/20"
  availability_zone       = element(var.availability_zones, count.index)

  # Public IP will be assigned automatically when the instance is launch in the public subnet
  map_public_ip_on_launch = true

  tags = {
    Name = "public${count.index}-${var.vpc_name}"
  }
}

# Route Table for public subnets
resource "aws_route_table" "public" {
  vpc_id = aws_vpc.default.id

  tags = {
    Name = "publicrt-${var.vpc_name}"
  }
}


# Route Table Association for public subnets
resource "aws_route_table_association" "public" {
  count          = length(var.availability_zones)
  subnet_id      = element(aws_subnet.public.*.id, count.index)
  route_table_id = aws_route_table.public.id
}


#### PRIVATE SUBNETS
# Subnet will use cidr with /20 -> The number of available IP is 4,096  (Including reserved ip from AWS)
resource "aws_subnet" "private" {
  count  = length(var.availability_zones)
  vpc_id = aws_vpc.default.id

  cidr_block        = "10.${var.cidr_numeral}.${var.cidr_numeral_private[count.index]}.0/20"
  availability_zone = element(var.availability_zones, count.index)

  tags = {
    Name               = "private${count.index}-${var.vpc_name}"
    Network            = "Private"
  }
}

# Route Table for private subnets
resource "aws_route_table" "private" {
  count  = length(var.availability_zones)
  vpc_id = aws_vpc.default.id

  tags = {
    Name    = "private${count.index}rt-${var.vpc_name}"
    Network = "Private"
  }
}

# Route Table Association for private subnets
resource "aws_route_table_association" "private" {
  count          = length(var.availability_zones)
  subnet_id      = element(aws_subnet.private.*.id, count.index)
  route_table_id = element(aws_route_table.private.*.id, count.index)
}


# DB PRIVATE SUBNETS
# This subnet is only for the database.
# For security, it is better to assign ip range for database only. This subnet will not use NAT Gateway
# This is also going to use /20 cidr, which might be too many IPs... Please count it carefully and change the cidr.
resource "aws_subnet" "private_db" {
  count  = length(var.availability_zones)
  vpc_id = aws_vpc.default.id

  cidr_block        = "10.${var.cidr_numeral}.${var.cidr_numeral_private_db[count.index]}.0/20"
  availability_zone = element(var.availability_zones, count.index)

  tags = {
    Name               = "db-private${count.index}-${var.vpc_name}"
    Network            = "Private"
  }
}

# Route Table for DB subnets
resource "aws_route_table" "private_db" {
  count  = length(var.availability_zones)
  vpc_id = aws_vpc.default.id

  tags = {
    Name    = "privatedb${count.index}rt-${var.vpc_name}"
    Network = "Private"
  }
}

# Route Table Association for DB subnets
resource "aws_route_table_association" "private_db" {
  count          = length(var.availability_zones)
  subnet_id      = element(aws_subnet.private_db.*.id, count.index)
  route_table_id = element(aws_route_table.private_db.*.id, count.index)
}
댓글남기기